> For the complete documentation index, see [llms.txt](https://docs.2checkout.com/llms.txt). Markdown versions of documentation pages are available by appending `.md` to page URLs; this page is available as [Markdown](https://docs.2checkout.com/connectors/connectors/integrate-wp-e-commerce.md).
# Integrate WP e-Commerce
## Availability
WP-eCommerce integration is available only for 2Checkout accounts that handle their own tax and invoice management (2Sell and 2Subscribe accounts).
#### WP e-Commerce Settings:
1. Download or clone the 2Checkout payment module at
2. Upload the ‘wpec-twocheckout-hosted’ directory to “/wp-content/plugins/” on your web server and activate the ‘2Checkout Payment Gateway for WP e-Commerce ’ plugin.
3. In your WordPress admin select **Settings** -> **Store** to open your WP e-Commerce settings.
4. Under **Payment** click **Settings** under 2Checkout.
5. Enter **Display Name**. Example: Credit Card (Visa, MasterCard, American Express, Discover, JCB, PIN Debit) and PayPal
6. Enter your [**2Checkout Merchant Code**](https://secure.2checkout.com/cpanel/account.php).
7. Enter your **2Checkout Secret Word**. (Must be the same value entered on your 2Checkout Control Panel.) To obtain the Secret Word, log in to your 2Checkout Merchant Control Panel and navigate to *Dashboard→ Integrations → Webhooks & API → Secret Word → INS Secret word*. Your **INS secret word** should be the same as the **buy-link secret word** (can be found under *Dashboard → Integrations → Webhooks & API*, scroll down to the Secret Word area, under the INS Secret Word). Edit your INS secret word and buy-link secret word to match each other, then copy and paste them into your WP-eCommerce admin.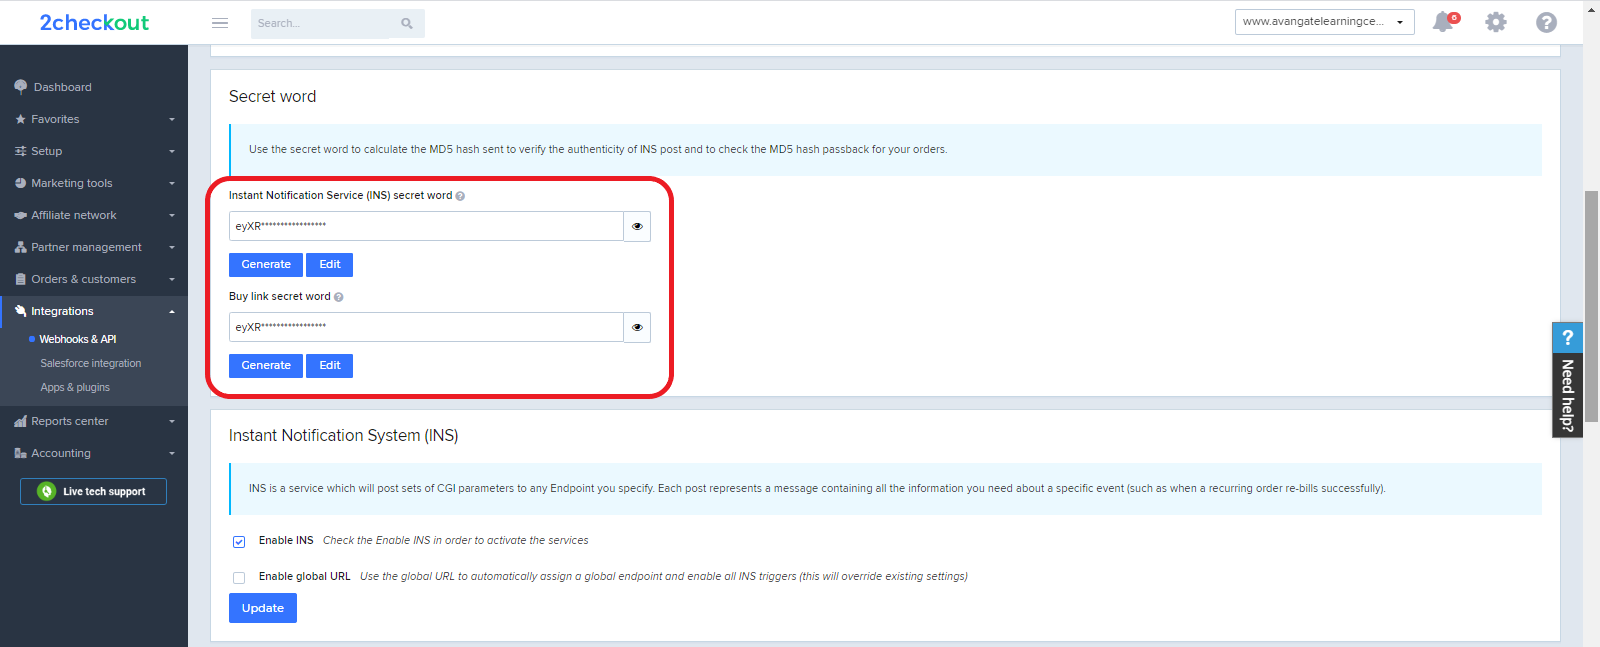
8. Select the language you want the 2Checkout purchase routine to be in.
9. Select ‘Production’ for live mode or ‘Sandbox’ for sandbox mode.
10. Select the appropriate billing fields for the **Forms Sent to Gateway** section.
11. Click **Update**.
#### 2Checkout Settings:
1. Sign in to your 2Checkout account.
2. Navigate to *Dashboard → Integrations → Webhooks & API*
3. Follow these steps to activate Redirect URL:
* In the **Redirect URL** section check **“Enable return after sale”**
* For Return method, select **Header redirect**
* Set the **Approved URL** to the URL provided in your WP e-Commerce settings (Replace [http://yourdomain.com](http://yourdomain.com/) with the actual URL to your domain)
* Click **Update** to **save** your settings
## About WP e-Commerce
WP e-Commerce is a free WordPress shopping cart plugin that lets customers buy products, services and digital downloads online.
For more information visit: [https://wpecommerce.org](https://wpecommerce.org/)
---
# Agent Instructions
This documentation is published with GitBook. GitBook is the documentation platform designed so that both humans and AI agents can read, navigate, and reason over technical content effectively. Learn more at gitbook.com.
## Querying This Documentation
If you need additional information that is not directly available in this page, you can query the documentation dynamically by asking a question.
Perform an HTTP GET request on the current page URL with the `ask` query parameter, and the optional `goal` query parameter:
```
GET https://docs.2checkout.com/connectors/connectors/integrate-wp-e-commerce.md?ask=&goal=
```
`ask` is the immediate question: it should be specific, self-contained, and written in natural language.
`goal` is optional and describes the broader end goal you are ultimately trying to accomplish on behalf of the user. GitBook uses it to tailor the answer towards what is most useful for that goal.
The response will contain a direct answer to the question and relevant excerpts and sources from the documentation.
Use this mechanism when the answer is not explicitly present in the current page, you need clarification or additional context, or you want to retrieve related documentation sections.